
TL;DR
This blog post outlines how to make a homelab accessible from the internet, covering topics such as setting up Static IP or DynDNS, securing SSH connections, using a VPS as a reverse proxy, bypassing public firewalls with sslh on port 443, enabling HTTPS for your domain and subdomains, configuring NGINX for multiple endpoints, and adding basic authentication to your services.
Making Your Homelab Accessible from Outside
Making your homelab accessible from outside your local network requires setting-up a fixed address you can send requests to. In this part I walk you through two main options for achieving this: Static IP and Dynamic DNS (DynDNS).
Get a permanent address
There are two primary methods to make your homelab accessible from the internet:
1. Static IP
With a secure setup in place to access our homelab, we’re now ready to start deploying services—stay tuned for the next posts!l a client (like ddclient) on your homelab or configure it on your box’s setting directly to automatically update the DynDNS record whenever your IP changes.
| Feature | Static IP | Dynamic DNS (DynDNS) |
|---|---|---|
| Advantages ✅ | - Fixed IP simplifies connection setup | - Cost-effective alternative to a static IP |
| - No reliance on third-party services | - Automatically adapts to IP changes | |
| Disadvantages 🛑 | - Additional monthly costs often required | - Relies on availability of DynDNS provider |
| - Limited availability from some ISPs |
In my case, a Static IP was included within my ISP’s subscription at no additional cost. This made it straightforward to choose this simplest option.
Configuring SSH
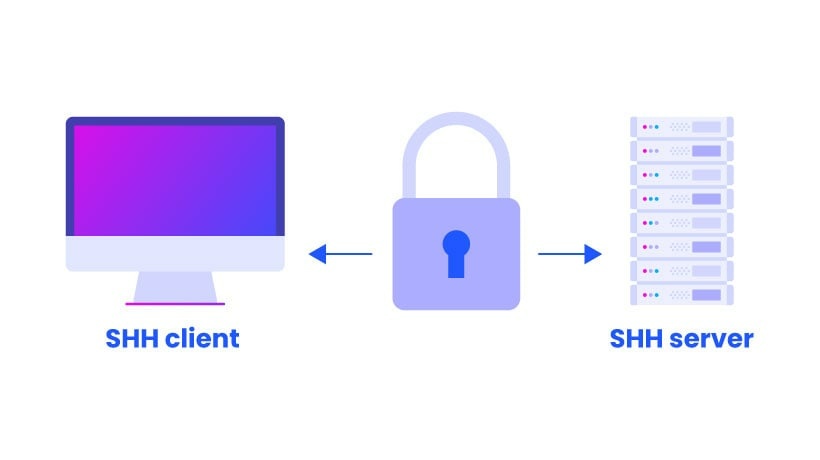
What is SSH?
Secure Shell (SSH) is a protocol used to securely connect to remote systems. It provides encrypted communication, enabling secure file transfers and command execution over an insecure network.
Installing and Configuring OpenSSH
On Ubuntu Server, OpenSSH is pre-installed by default.
Otherwise you can install it easily on common distros (Debian/Ubuntu, CentOS/RHEL, Fedora, Arch Linux) using the package manager:
sudo apt update && sudo apt install openssh-server # Debian/UbuntuImproving Security
To enhance the security of your SSH setup, follow these key steps:
1. Change the Default Port:
- To minimize exposure to automated scanning attacks, configure your router to expose a custom port (e.g., 2222) instead of the default port 22 for external access.
- Retain port 22 for internal connections if needed, but reroute external traffic from the custom router port to internal port 22. Alternatively, modify the default port directly in the
/etc/ssh/sshd_configfile using thePortdirective. - Apply the changes by restarting the SSH service:
sudo systemctl restart ssh.
# This is the sshd server system-wide configuration file.  See
# sshd_config(5) for more information.

# This sshd was compiled with PATH=/usr/local/sbin:/usr/local/bin:/usr/sbin:/usr/bin:/sbin:/bin:/usr/games

# The strategy used for options in the default sshd_config shipped with
# OpenSSH is to specify options with their default value where
# possible, but leave them commented.  Uncommented options override the
# default value.

Include /etc/ssh/sshd_config.d/*.conf

Port 2222 # SET CUSTOM PORT HERE
2. Enable Key-Based Authentication:
- Run
ssh-keygenon your local machine to generate an SSH key pair (a passphrase is optional, especially if your hard drive is encrypted).
ssh-keygen -t ed25519 -C "Homelab connection"- Add the public key to the server’s
~/.ssh/authorized_keysfile withssh-copy-idor manually append it usingcat mykey.pub >> ~/.ssh/authorized_keys.
# On the server
mkdir ~/.ssh
chmod 700 ~/.ssh
cat mykey.pub >> ~/.ssh/authorized_keys
chmod 600 ~/.ssh/authorized_keys- To enhance security, disable password authentication by setting
PasswordAuthentication noin the/etc/ssh/sshd_configfile. - It’s a good practice to disable unused authentication methods like
KerberosAuthenticationandGSSAPIAuthentication, not only for security but also to improve the authentication process speed.
3. Monitor and Log Connections:
- Regularly check your server logs (e.g.,
/var/log/auth.logor/var/log/secure) for unauthorized login attempts. - Use intrusion detection tools like
fail2banto automatically block IPs exhibiting suspicious behavior.
Find more details on securing SSH connection (such as enabling 2FA) to your server there How to Secure an SSH Server in Linux.
On the client side
By now you should have generated an SSH key pair. To easily connect to your server, you can add the following configuration to your ~/.ssh/config file:
Host homelab
   HostName <your-server-ip> # or your DynDNS domain
   Port <custom-port> # The port you configured
   User <your-username> # Your username on the server
   IdentityFile ~/.ssh/id_rsa # Path to your private key
   IdentitiesOnly yes # Prevents SSH from trying other keys
This configuration allows you to connect to your server by simply running ssh homelab.
Using Ports 443 or 80 to Bypass Public Firewalls
In corporate or public environments, non-standard ports are often blocked for security reasons. Configuring your service to use standard ports like 443 (HTTPS) or 80 (HTTP) ensures accessibility and avoids restrictions imposed by these firewalls.
However, this setup may conflict with using port 443 for HTTPS when setting up communication with our reverse proxy in the next section. We’ll address this challenge by leveraging sslh.
Secure Your Server with a Reverse Proxy

What is a Reverse Proxy?
Generally, a proxy server functions as an intermediary, forwarding requests from internal servers to external servers. In contrast, a reverse proxy handles requests from external clients and directs them to the appropriate server within an internal network. Reverse proxies serve multiple purposes, such as load balancing, routing, caching, and more. For my self-hosting project, its primary role is to securely expose services from my homelab to the internet, providing protection against DDoS attacks, concealing backend servers, and potentially enabling load balancing in the future.
Setting Up a VPS as a Reverse Proxy
You can choose any Virtual Private Server (VPS) provider to set up a reverse proxy. Options include AWS EC2 t4g.micro starting at €2.60/month, Google Cloud’s f1-micro compute engine, or other providers like DigitalOcean, Linode, and Vultr. Personally, I opted for OVH’s VPS at €4.60/month with Ubuntu Server 24.04 LTS.
While this is a fixed VPS option, you could also consider an elastic instance depending on the demand for your services.
Only Allow SSH Connections from Your Reverse Proxy as ProxyJump
Configuring your homelab to only allow external SSH connections from your reverse proxy using ProxyJump adds an additional layer of security. Here’s a detailed breakdown:
1. Restrict Direct Access:
Adjust your firewall rules, either in your router, or in your server to deny all incoming SSH traffic except from the reverse proxy’s IP address. This ensures only trusted traffic can reach your homelab.
If doing this on your server you might need to install
ufw(Uncomplicated Firewall), and only allow local connections and your reverse proxy IP address (See How to Safeguard Remote Connections with Ubuntu’s Firewall)
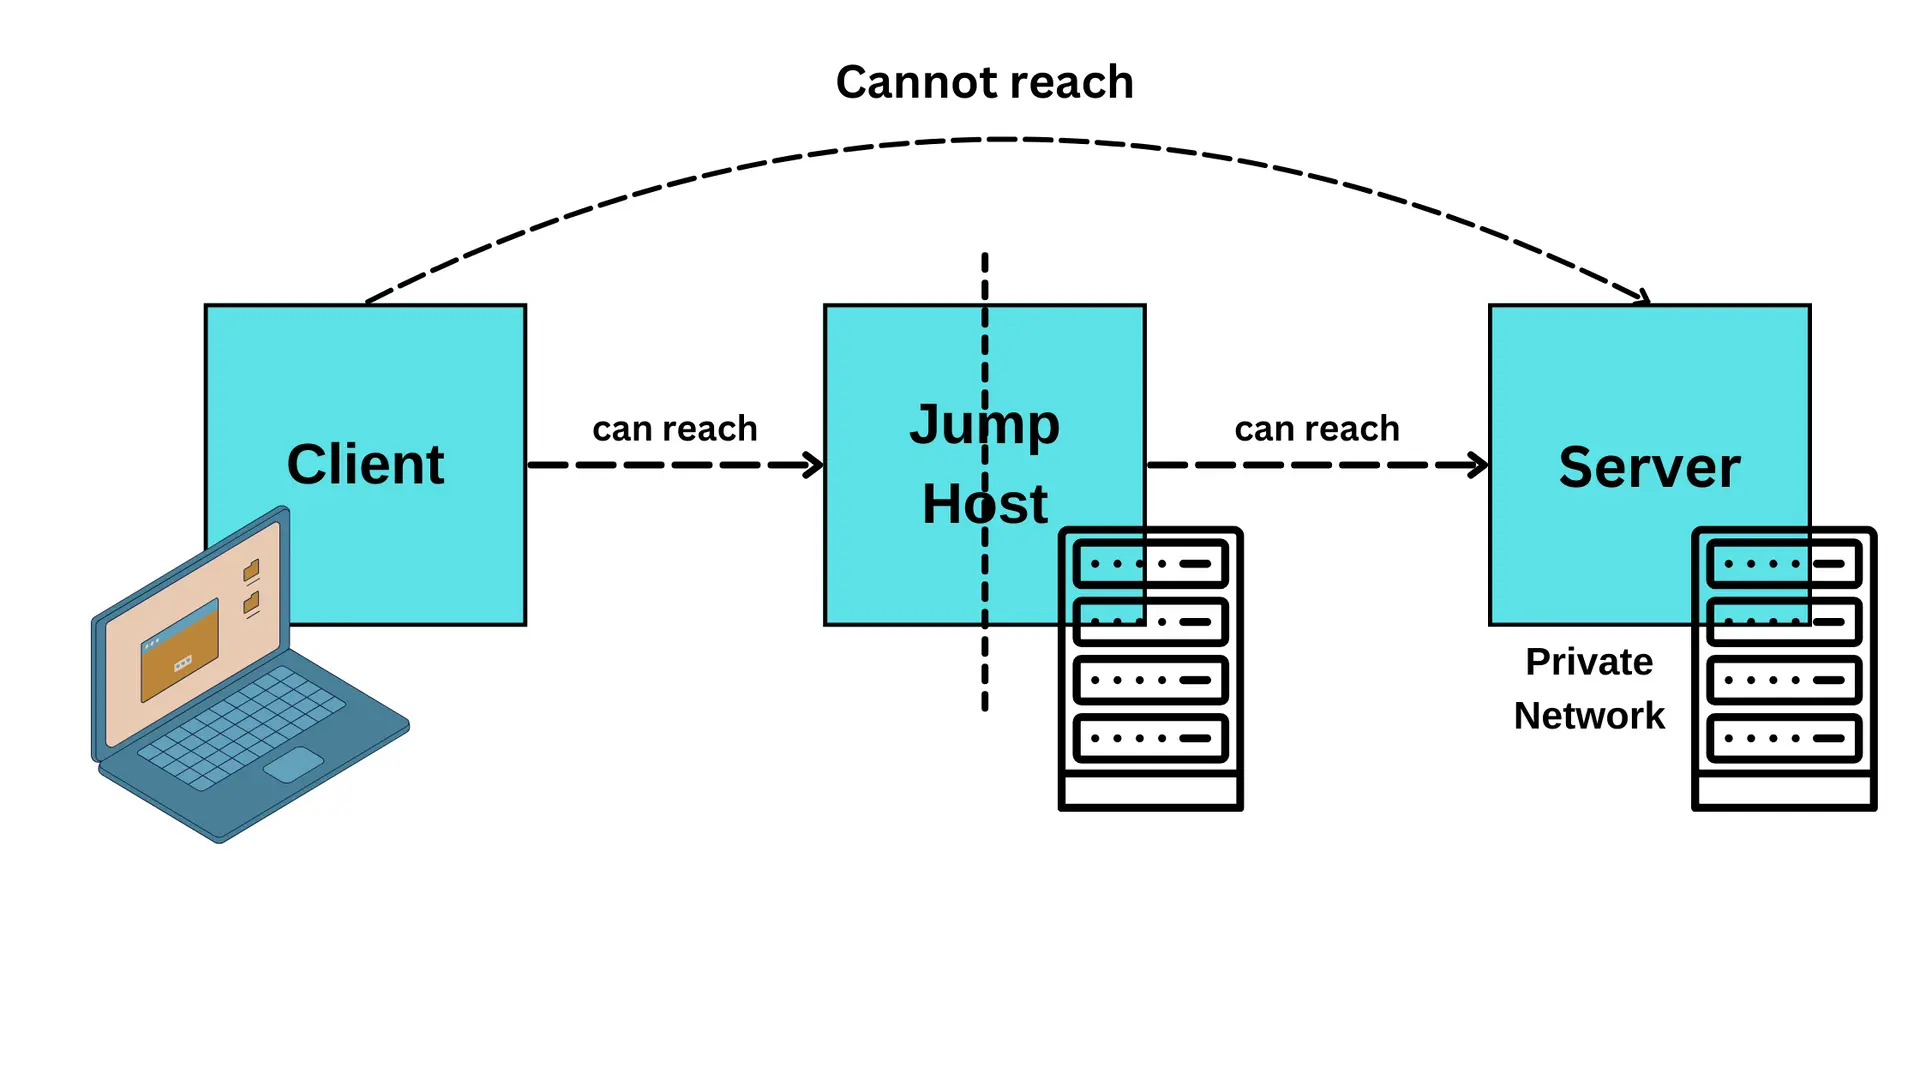
2. Use SSH ProxyJump:
ProxyJump enables you to chain your SSH connections through the reverse proxy. You first need to configure your SSH server and client like in the previous section.
Host myproxy
   HostName <your-reverse-proxy-ip>
   User <your-username>
   IdentityFile ~/.ssh/id_rsa
   IdentitiesOnly yes
Then, modify your homelab entry to connect to your homelab through the reverse proxy:
Host homelab
   HostName <your-server-ip> # or your DynDNS domain
   Port <custom-port> # The port you configured
   User <your-username> # Your username on the server
   IdentityFile ~/.ssh/id_rsa # Path to your private key
   IdentitiesOnly yes # Prevents SSH from trying other keys
   ProxyJump myproxy # Your reverse proxy IP
This simplifies accessing your homelab securely by ensuring all SSH traffic is tunneled through the reverse proxy.
By using this configuration, your homelab is better protected from unauthorized access, while maintaining ease of use for legitimate connections.
Enable Several Endpoints with NGINX: The All-in-One Request Handler
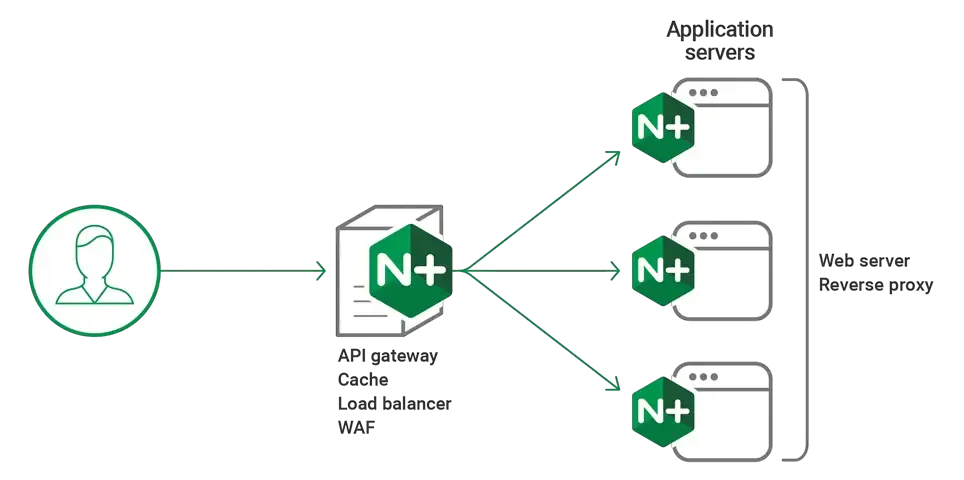
What is NGINX?
NGINX is a high-performance, open-source software that can function as a web server, reverse proxy, and load balancer. It efficiently manages numerous concurrent connections and is widely used for serving static files, proxying HTTP/S traffic, and distributing traffic across services.
Enable Different Endpoints
Most of the time you will want to host multiple services on your homelab. NGINX allows you to route requests to different services based on the domain, subdomain names or paths. Here’s how you can set it up:
Register a domain name
Having a registered domain name allows you to establish a unique online identity, while subdomains enable you to host multiple service endpoints under the same domain.
For example, a domain like example.com can be used for your main website, and subdomains like blog.example.com, translator.example.com, or chat.example.com can host specific services such as a blog, a translation tool, or a chat platform.
I personnally registered a domain name for 0.99€/year on OVH Cloud, but you’ll find many other such services online. Once bought those platforms allow you to register subdomains and configure DNS records to redirect them to your reverse proxy IP address.
Secure your communication with HTTPS
Securing your communication with HTTPS is essential for protecting data in transit when making requests to your proxy server. Here’s how you can configure HTTPS using Let’s Encrypt:
Generate SSL Certificates with Let’s Encrypt
There are two types of challenges you can use to prove domain ownership to Let’s Encrypt: HTTP-01 and DNS-01. The HTTP-01 challenge requires you to host a file on your server, while the DNS-01 challenge involves adding a TXT record to your domain’s DNS settings. The DNS-01 challenge allows you to secure all potential subdomains using wildcard certification, but is a bit more complex to set up.
In the end you always end-up with two files fullchain.pem and privkey.pem that you can use in your NGINX configuration to enable HTTPS.
For more details on how to set up HTTPS with Let’s Encrypt, check out How To Create Let’s Encrypt Wildcard Certificates with Certbot.
SSLH for HTTPS Port Overload
In section Configuring SSH, we mentioned that using ports 443 or 80 can help bypass public firewalls. However, this leads to conflict when you also want to listen with your NGINX server for https requests.
To solve this issue, you can use sslh to deal with the 443 port overload, enabling both HTTPS and SSH connections on the same port.
Install sslh:
Install sslh for your favorite distribution:
sudo apt install sslh # Debian/UbuntuConfigure sslh:
Edit the configuration file /etc/default/sslh to listen on the desired ports using the DAEMON_OPTS variable.
# Default options for sslh initscript
# sourced by /etc/init.d/sslh

# binary to use: forked (sslh) or single-thread (sslh-select) version
# systemd users: don't forget to modify /lib/systemd/system/sslh.service
DAEMON=/usr/sbin/sslh
SSH_PORT=2222 # Your local SSH port
SSL_PORT=2223 # Your local NGINX port

# Example configuration
DAEMON_OPTS="--listen 0.0.0.0:443 --ssh 127.0.0.1:${SSH_PORT} --tls 127.0.0.1:${SSL_PORT}"
In the above configuration we listen to port 443 and forward SSH connections to your local SSH port and HTTPS connections to your local NGINX port, here we set 2222 and 2223 respectively as an illustration.
Configure NGINX for HTTPS
Configuration of NGINX involves the following file structure:
/etc/nginx/: Main directory for Nginx configuration files./etc/nginx/nginx.conf: Primary configuration file for global settings, including worker processes, logging, and inclusion of other configuration files./etc/nginx/sites-available/: Stores server block configuration files for potential virtual hosts (inactive by default)./etc/nginx/sites-enabled/: Contains symbolic links to the configuration files insites-availablethat are currently active.
NGINX Server Block Example
Once you have your SSL certificates, you can configure NGINX to serve your services over HTTPS. Here’s a basic example of an NGINX server block with a HTTP to HTTPS redirection.
>>>/etc/nginx/sites-available/hello.mydomain.com# HTTPS server block for hello.mydomain.com
server {
listen 2223 ssl; # Listen for ipv4 on port 2223
listen [::]:2223; # Listen for ipv6 on port 2223
server_name hello.mydomain.com;
# SSL certificate and key generated with Let's Encrypt
ssl_certificate /path/to/mycertificate/fullchain.pem;
ssl_certificate_key /path/to/mycertificate/privkey.pem;
# Location for "Hello World" JSON response
location /hello {
default_type application/json;
return 200 '{"message": "Hello World!"}';
}
}
# Set an automatic redirection from HTTP to HTTPS
server {
if ($host = hello.mydomain.com) {
return 301 https://$host$request_uri;
}
listen 80;
listen [::]:80;
server_name hello.mydomain.com;
return 404;
}To enable the server, you need to create a symbolic link to its configuration file in the /etc/nginx/sites-enabled.
sudo ln -s /etc/nginx/sites-available/hello.mydomain.com /etc/nginx/sites-enabled/Finally, restart NGINX to apply the changes:
sudo nginx -t # Test the configuration
sudo nginx -s reload # Reload NGINX
If you encounter some problems despite the validation of the configuration, you can check the logs in /var/log/nginx/error.log for more information.
tail -f /var/log/nginx/error.logYou can also check the status of the service with:
sudo systemctl status nginx # Check NGINX statusMake a Proxy_Pass to Homelab
In the above example we just returned a simple JSON response, but you can also configure NGINX to forward requests to another server external or local (for example, a docker instance) using the proxy_pass directive.
# HTTPS server block for hello.mydomain.com
server {
   listen 2223 ssl;
   listen [::]:2223;
   server_name hello.mydomain.com;

   # SSL certificate and key generated with Let's Encrypt
   ssl_certificate /path/to/mycertificate/fullchain.pem;
   ssl_certificate_key /path/to/mycertificate/privkey.pem;

   # Proxy pass to another server here local, but could be remote
   location /hello {
      proxy_pass http://127.0.0.1:8080/hello;
   }
}
By configuring NGINX also on your homelab, you can route requests through your reverse proxy to different services or Docker containers in your homelab servers.
Basic Authentication
To add an extra layer of security, you can enable basic authentication for your services. This requires users to enter a username and password before accessing the service.
Create hash password file htpasswd
Below command creates a file mypasswdfile and registers user john with password doe as valid credentials.
sudo apt install apache2-utils # Install apache2-utils to have htpasswd command
sudo htpasswd -c /etc/nginx/mypasswdfile john:doe # Create a new user
Update NGINX configuration with basic authentication
Add the following lines to your server block configuration:
>>>/etc/nginx/sites-available/hello.mydomain.com# HTTPS server block for hello.mydomain.com
server {
listen 2223 ssl;
listen [::]:2223;
server_name hello.mydomain.com;
# SSL certificate and key generated with Let's Encrypt
ssl_certificate /path/to/mycertificate/fullchain.pem;
ssl_certificate_key /path/to/mycertificate/privkey.pem;
# Proxy pass to another server here local, but could be remote
location /hello {
auth_basic "Restricted Content"; # Arbitrary message shown for authentication
auth_basic_user_file /etc/nginx/mypasswdfile;
proxy_pass http://127.0.0.1:8080/hello; # Proxy pass to another server only if credentials are valid
}
}⚠️ Proxy Pass vs. Return
If you use a return statement in your location block, it will return the response directly to the client even if the client is not authenticated. On the other hand, if you use a proxy pass, the request will be forwarded to the server only if the client is authenticated.
If we want to return { "message": "Hello World!" } only if the client is authenticated, we should use a proxy pass to a local server that returns this message.
# HTTPS server block for hello.mydomain.com
server {
   listen 2223 ssl;
   listen [::]:2223;
   server_name hello.mydomain.com;

   # SSL certificate and key generated with Let's Encrypt
   ssl_certificate /path/to/mycertificate/fullchain.pem;
   ssl_certificate_key /path/to/mycertificate/privkey.pem;

   # Location for "Hello World" JSON response
   location /hello {
      auth_basic "Restricted Content"; # Arbitrary message shown for authentication
      auth_basic_user_file /etc/nginx/mypasswdfile;
      proxy_pass http://127.0.0.1:8080/hello;
   }
}

server {
   listen 8080;
   listen [::]:8080;

   location /hello {
      default_type application/json;
      return 200 '{"message": "Hello World!"}';
   }
}
Conclusion
In this blog post, we covered the initial steps to get you started and your homelab accessible from the internet securely. We discussed the benefits of using a static IP or Dynamic DNS, configuring SSH, setting up a reverse proxy, and enabling multiple endpoints with NGINX. We also explored how to secure your communication with HTTPS and use sslh to handle HTTPS port overload.
With a secure setup in place to access our homelab, we’re now ready to start deploying services—stay tuned for the next posts!🚀